I'm a big fan of both cocktails and kits, so my very thoughtful (and enabling roommate) put two and two together and brought me a DIY Bitters kit.When I opened it, I was surprised to learn how simple bitters are to make. Really, all you have to do is to seep some spices/dried herbs in a base liquor for several weeks, then strain them out. With such simple a process, I decided to make my use of the kit more (needlessly?) complicated by documenting the procedure. I'm making a video step-by-step guide that ends with a beverage!
For inspiration there's a wonderful YouTube show called "Thirsty For" which uses a very distinct style to follow the crafting of a beverage. Though it only follows the process from bar ingredients, I think the concept could easily extend to show the making of the ingredients themselves, in this case bitters. Having played around with making short videos in the past, I knew the best way to organize the filming would be a storyboard. By drawing out each clip I give myself a checklist of shots to get, which also predetermines how the final video will flow (making editing far simpler.) This may seems kind of obvious, maybe even unnecessary for something so simple, but I've tried a "wing it" approach in the past. It leads to a headache of editing in order for any kind of video coherence to emerge. It's also really easy to forget to some small detail.
Here's the storyboard I sketched up:
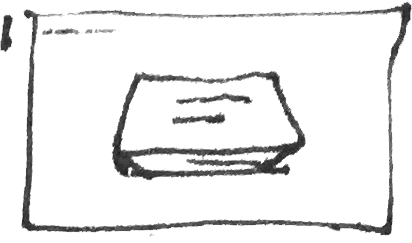 I'll start with an overhead shot of a blank working surface, then set down and open the kit.
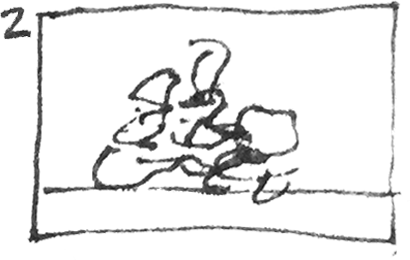 I was kind of surprised by the amount of bubble wrap in the kit, but then I suppose it is filled with glass vessels. Rather than showing me tediously unwrapping every one of them, I'll just show the pile of discarded wrap on the side.
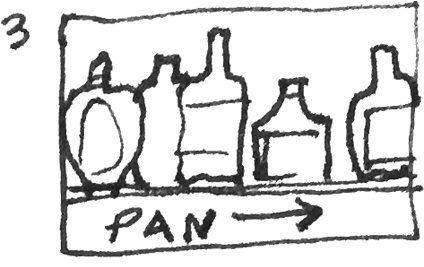 I will also need a base liquor, and I think a panning shot would be a good way to show off my extensive (not really though) liquor collection. As the shot pans across the bottles, a disembodied hand will pluck one off the shelf. To be the base spirit.
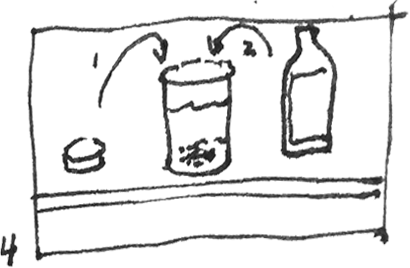 Shot 4 will probably be where the most actually happens: I'll pour the spices and the liquor into one of the provided "mixing" jars (no different from a regular jar.) That's really kinda it.
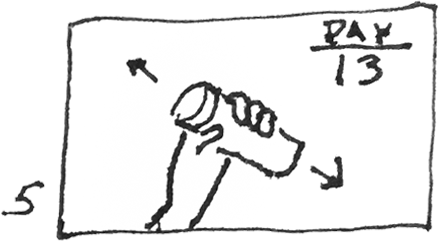 Ok, I guess there's a little more to it. The kit does say it needs to seep for a period of 3 weeks, and it suggests agitating it every few days to help the herbs infuse. I could take 2 approaches here: Either a motionless time lapse shot (light changes, jar stays still) OR I can have a series of shots showing me "agitating" the jar. I'll just film myself shaking it over the next few days and throw it together in a montage.
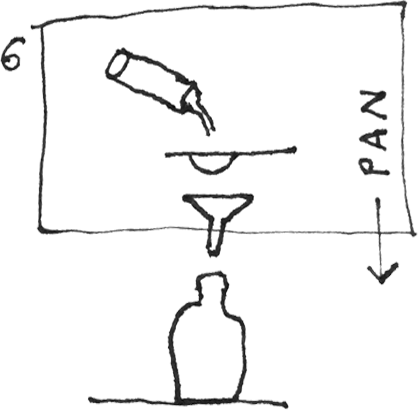 After 3 weeks are up, it's time to strain out the solids. I think another panning shot will do nicely. This time we'll pan vertically. Following the liquid as it flows from one jar, through a filter, down a funnel, and into another jar.
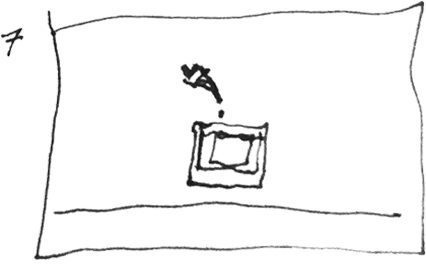 The video probably wouldn't be complete without the finishing touch. As they always did in ThirstyFor, it ends with a completed drink. I think I'll take have an Old Fashioned or some such classic already made, then drop a few drops of the bitters into it. Scene!
With each of these shots laid out, it's time to start shooting.