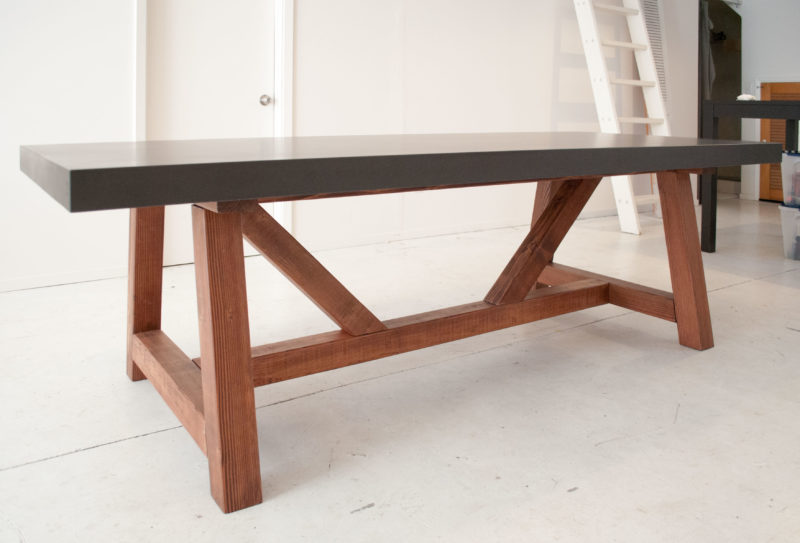
The base is built following the deisgn of this 4x4 Truss Beam Table by Ana White. The geometry and dimensions of the base are the same, but there are some differences in execution.
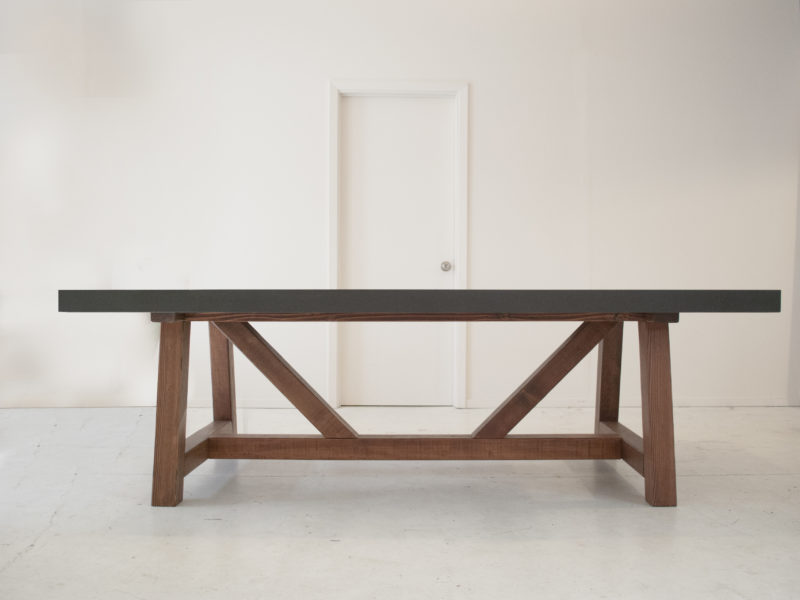
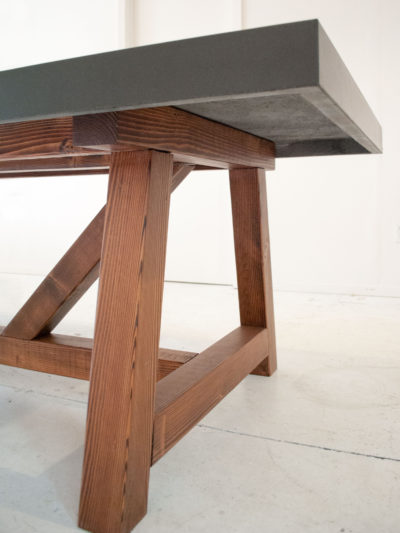 I'd originally purchased 2 x 12 x 8' boards to be the top, but instead I used a black concrete slab. I didn't make this top, and I don't recommend trying to recreate it. That being said, I think it looks beautiful on the base.
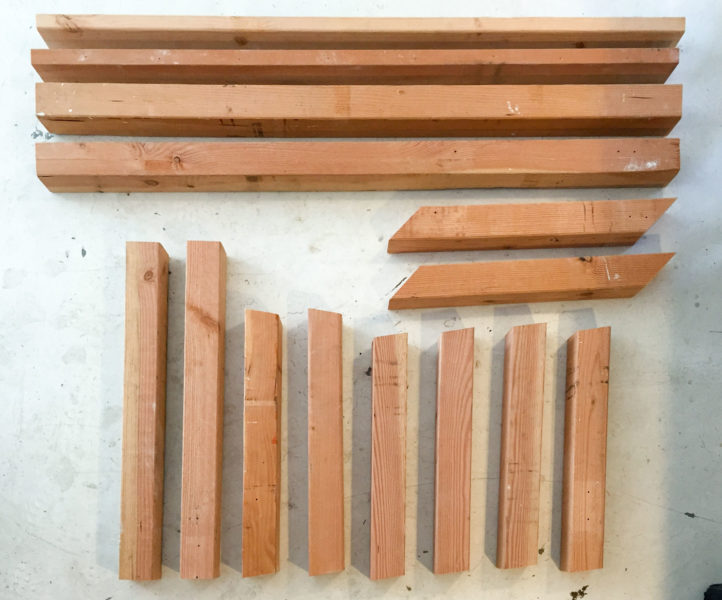
All of the pieces are made from leftover 4x4s from my homemade scaffolding. In fact, I planned out the scaffolding with this project in mind. I laid them all out and searched for the areas with rough patches, knots, and grain patterns. Then I marked out all the cuts I needed.
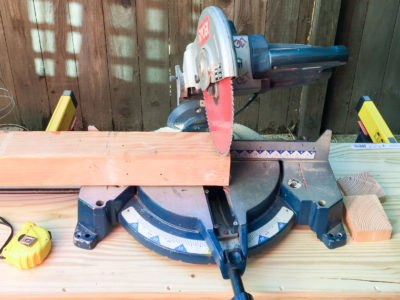 I always enjoy the cutting, its a great way to build momentum with a project. There's a slight angle on the main leg pieces that must be kept consistent, so once I set the saw to that angle I had to make all the corresponding cuts. My circular saw is a scary-large, craigslist freebie that needs a new blade guard, base plate, and blade. The fact that this is among the safer saws I have owned says more about the other saws (and my low standards) than about this beast. That being said it was able to make the cuts successfully.
 There was a full morning of sanding each face of these pieces followed by an afternoon prepping and staining them. I'd wisely chosen to do the sanding outside, so I didn't kick up a cloud of sawdust inside. I didn't have quite the same foresight with the staining, and the smell of it lingered for at least a week. For the stain I used "Minwax: Red Oak 215" and for the sealer "Varathane: Triple Thick Polyurethane, Clear Matte." And of course I tested this out to make sure it had the look I was after.
I debated about whether to finish the piece before or after assembly, and couldn't get a find a persuasive recommendation online. Since I was using a dark stain on a light wood I figured it was best to make sure I get all surfaces so there'd be no chance of missing a hard-to-reach spot in the assembled table. Also, because of the jointing technique I'd be using I wouldn't need the "raw" face of the wood for gluing, so it was OK to seal.


The attachment system is where this table makes a critical departure from the one on Ana White's website. That table relies on pocket screws, but reading the comments pointed out the structural weakness of this approach. Since the table top weighs a little over 300 lbs, I would need a more substantial joint. After some research on wood joints, I decided a floating tenon joint of some sort would be the easiest, strongest alternative. At first I thought biscuit joints would be basically the same thing. I tried a mock up with one section, but there was a gap between the pieces of lumber caused by the saw not being square. If the 4x4s didn't rest on each other, then all the load would have to go through skinny little 1/8th inch slivers of plywood. Even with two biscuits per joint, I knew I wanted something more substantial. Luckily, my friend has a domino joiner and was happy to loan it to me. With a bit of surgery I was able to cut open the two biscuits and replace them with two dominos. I probably lost some strength to the overlapping slots, but I still feel much more confident about the joints.
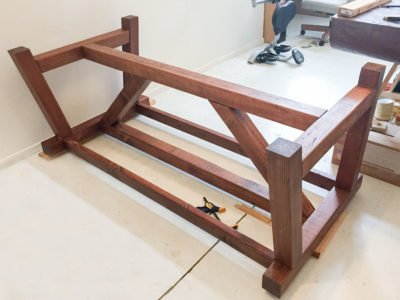 With all the jointing done, the table was a relative cinch to assemble. I gave it a full 24 hours for the glue to fully dry, but the geometry of the pieces actually keeps the domino joints from falling apart. With the help of 3 other people. I hefted the concrete top onto the table base, lined it up and put it in position.
I'm really happy with how the table turned out. The concrete top is a large part of that, and I can't take any credit there, BUT I do think the base looks pretty darn nice too. The two colors play off each other quite nicely, and the angles of the base give it a very sophisticated look.
You can’t spell “massive” without mass.