The pendant lamp shades I made have a very simple design. The devils, however, is ever in the details. I needed 5 of themn, and wanted them to come out consistent. To achieve this, I spent a couple of weekends gathering materials, testing connections, and developing every step of the process before making a single lamp.
Admittedly, at first, I sought the easy route. There are 2 large "farm-house" style bell lamps that came with the space, but try as I might I couldn't find anything that matched them or even came close, nor could I find a different style of lamp shade that would work (especially for the right price.) Eventually, I accepted that I'd have to make them myself. The lamps would have to match the large scale of the space to avoid looking dinky, and since I was going to make 5, I wanted simple minimal materials to keep costs under control. A cylinder was an easy design call.
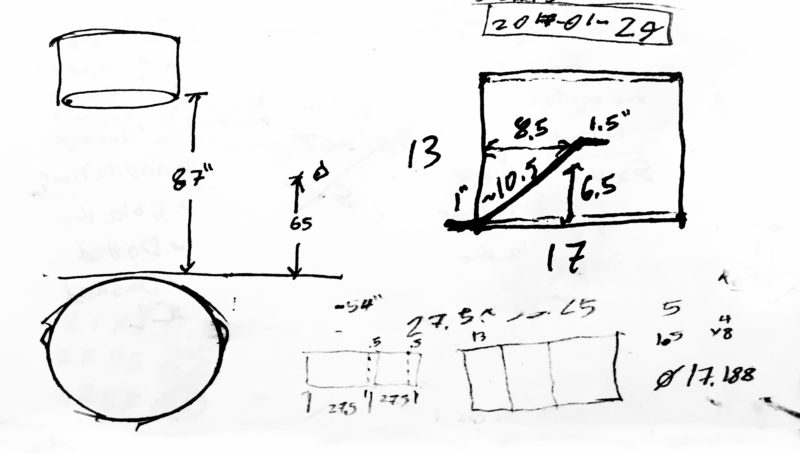
I started sketching out the shape and finding constraints to for the proportions. I matched the height to a permanent pendant lamp already in the space. I also estimated the diameter of cylinder based on a standard sheet material or 48" (a guess which quickly proved wrong.) This was enough to also estimate a lamp depth to make sure the bulb wouldn't be visible until you're basically right underneath it looking up.
Economy of sheet material quickly became one of the biggest design constraints, so I started trying to figure out what it would be. Originally, I'd thought wood veneer, but was unable to find big enough sheets. After scouring several art supply stores I finally found a type of paper with just the right balance of rigidity, transparency, color tone, and sheet size. At $10 a sheet, it wasn't cheap, but I found no other options. Working from an acceptable range dimensions, I calculated that I could get 1.5 lamps per sheet.
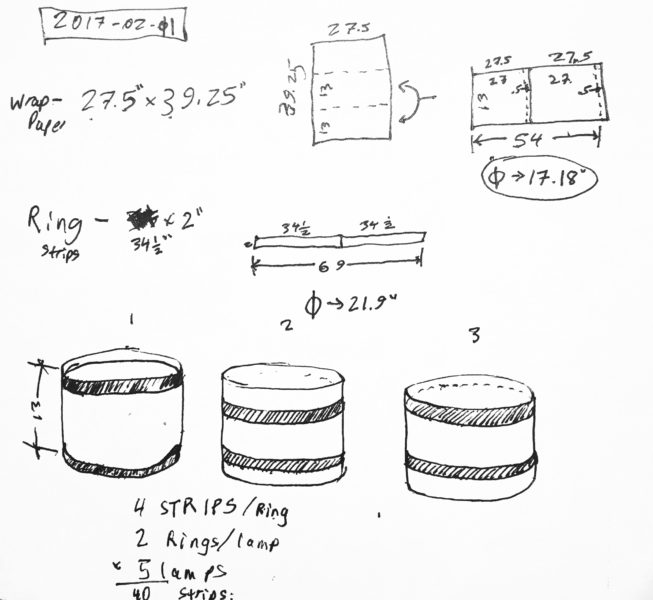
 The next detail to be worked out was the hoop construction. I always try starting with what I have, and thought originally to use some strips of bamboo that I salvaged from some broken blinds. When the light was on, however, the hoop would appear as a black band, so I toyed with making that a design feature. Ultimately, when I tried to laminate the strips together to form a hoop, I was shocked at how rigid they actually were. When I un-clamped my mock-up it pulled apart and slapped me right in the face.
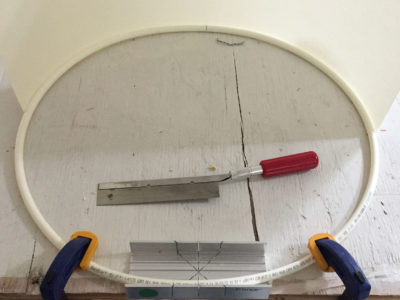 The PVC pipe I found at my local big orange box proved just the ticket, and would be a (theoretically) simple matter hoopify by using a dowel. Some trial and error proved that the dowel would break if it was wood, and would visibly affect the curve if it was more than 1" long. The solution was a steel dowel (cut down with a hack saw.)
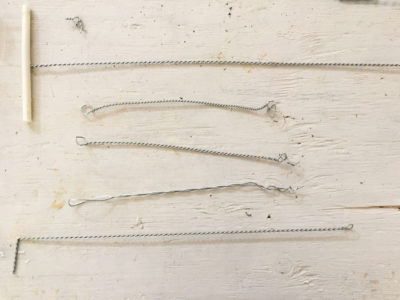 Next up was the attachment to the pendent lamp. In architecture school, some of my friends were in a studio that focused on using cheap fencing wire to build temporary installations. Drill-twisted wire is something that stuck with me from some of the ways they managed to make the wire stiffer, so I decided to use this as a spoke for the hoop. I'd originally planned to twist the wire onto the pipe directly, but realized it was much easier to bend the wire and jamb it directly into a hole in the hoop.
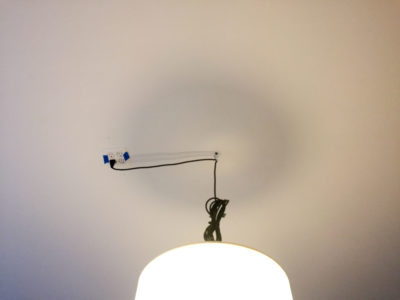 As you'll notice in the video, the attachment "washer" is a CD. I needed something round, thin, with enough flat surface to adhere the cantilevered spokes out straight. I also happened to have a giant container of discarded CDs in my collection of randomly hoarded things. Unfortunately, the hole in the middle was not actually the perfect size. I had to make a mess out of drilling it out withe a borrowed forstner bit. When I made the lamp shown in the video, however, the reflective coating cast a really annoying shadow on the top of the ceiling. Scraping it off gave uniform light spread above and gave me a nice rough surface on the actual plastic to adhere the spokes to.