During our construction project there was a running joke that the warped studs (thanks Home Depot) could be hidden by the drywall, the bowing drywall could be hidden by mud, the uneven mud could be hidden with paint, and if all else failed: Framed Wall Art!
Although, after putting so much work into them, I'm reluctant to put holes in the walls, I think a few well framed posters would actually liven the place up a little bit. After checking the price for custom-sized frames, I decided I'd rather try to size them myself.


A quick trip to Salvation army netted me a decent looking pair of frames with glass. Even though I would be more comfortable working with acrylic, I know for sure that glass is ultimately going to look way better, and resist scratching for longer. I'd ordered a glass cutter for this project and was looking forward to learning how to use it.


For the first frame, I needed to cut down the pieces. Since my saw isn't exactly razor sharp, I kept getting tiny bits of tear-out, which wouldn't normally matter, but it's highly visible against the black material. I experimented with different face up/face down orientations and right/left side of saw blade, and got it as clean as possible, then finished the job with a quick sharpie touch up.
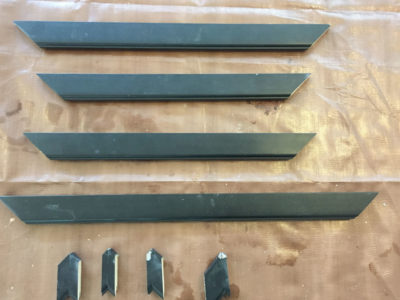 Another detail I had never considered is the importance of cutting each leg of the frame as precise as possible. If anything was off, the frame would be out of square and/or the miter joints would pull apart. Again, my saw isn't super precise, so I had to shave tiny amounts off until each leg matched it's opposite exactly.
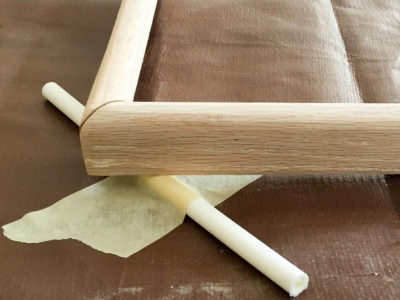
When it was time to join the whole thing up. I discovered another shortcoming of my saw: the blade is not perfectly 90 degrees! This creates a taper at each cut that adds up to create an offset between to pieces. To correct this I supported the seam and held it flush with clamps before popping in a few brad nails.


With the frame completed, it was time to cut the glass. Each cut is a two-step procedure: score with the glass cutter and snap at the line. A few test cuts revealed the challenges at hand. Scoring required a good deal of pressure on the glass cutter, which could hit the glass when the blade ran off the edge. Many glass cutters have an angle on the backside to avoid this collision, but since I cheaped out, mine didn't have this detail. Good to know for the future.


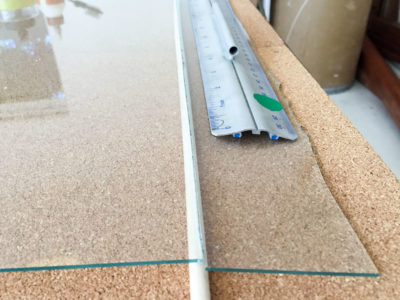 Also, snapping the glass requires quick, even pressure across length of the break otherwise it will only break where you hit it. I found the best method was to distribute pressure with a ruler and support the break line on dowel.
To trim down the backing board, I cut it evenly on either side of the hanging hardware so I could reuse it. I tried to salvage those little tabs as well, but they seem to be applied with a tiny eyelet. Luckily, I've got some strips of wood which wedge into that groove very nicely and even help press the backing and picture up against the glass.


 The second frame was WAY easier because it was already the right size. I just needed to sand off a patchy paint job to expose the hardwood of the frame. I sealed this up with 2 coats of polyurethane and was good to go.
All in all this was a great learning experience. I got a chance to learn glass cutting, practice making things more precisely, and solve the little problems as they arose. I learned that making something more simple can also make it more challenging because it will show more imperfections, and that choosing the right style of frame is crucial to not detracting from the design itself. The two posters I'm framing work very well in their frames, and I'm quite pleased with how they came out.
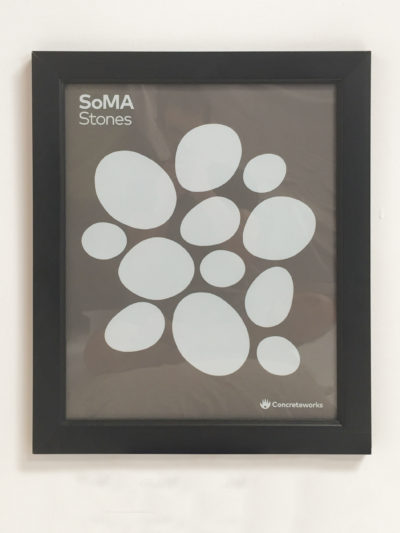 The first one is for a product my company makes called "SoMA Stones." They are large, landscaping pieces shaped like a smooth pebble which we cast out of concrete, and they're one of the most popular products. The second was a giveaway prize I got for participating in a survey conducted by Fictiv, a start-up/manufacturing distribution platform. In true geeky fashion, it is a periodic table of manufacturing processes, tips, and terms related to CNC machining. Love it!

Hope you didn’t cut off any important fingers during the cutting steps. The reflection in the soma stones photo makes it look like the poster is wrinkled. Otherwise, nice documentation and impressive craftsmanship!