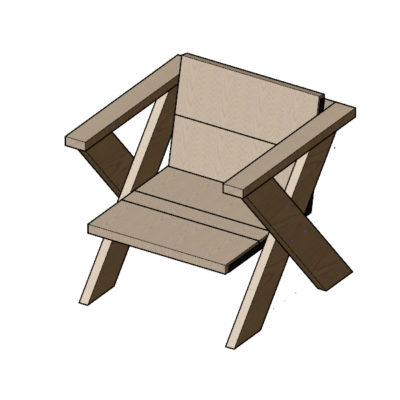
After mocking up the dimensions and angles I wanted for the X-Shaped chair, I brought those parameters into Rhino to finalize the design.

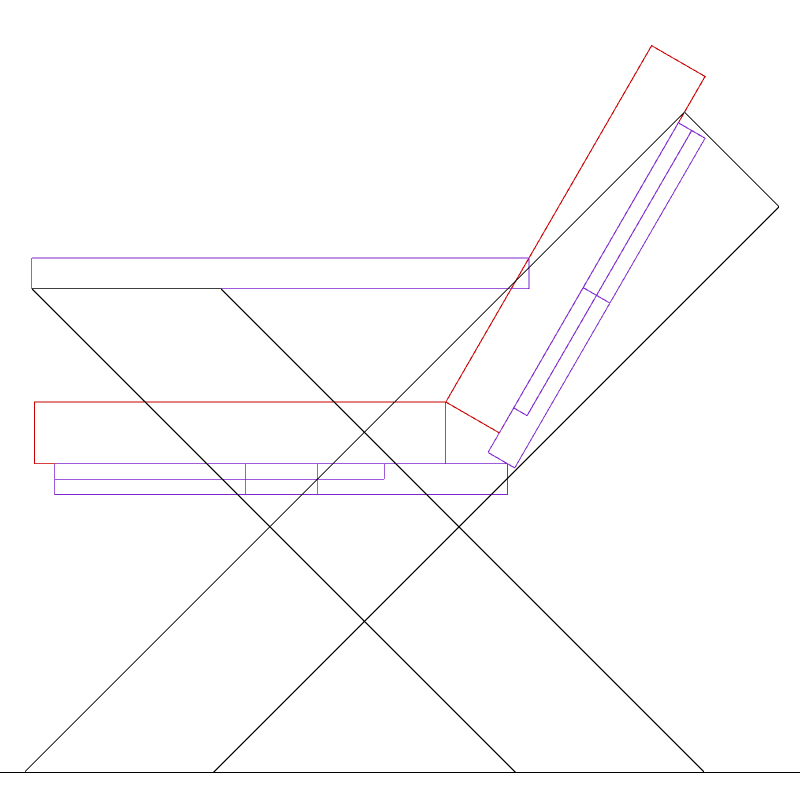
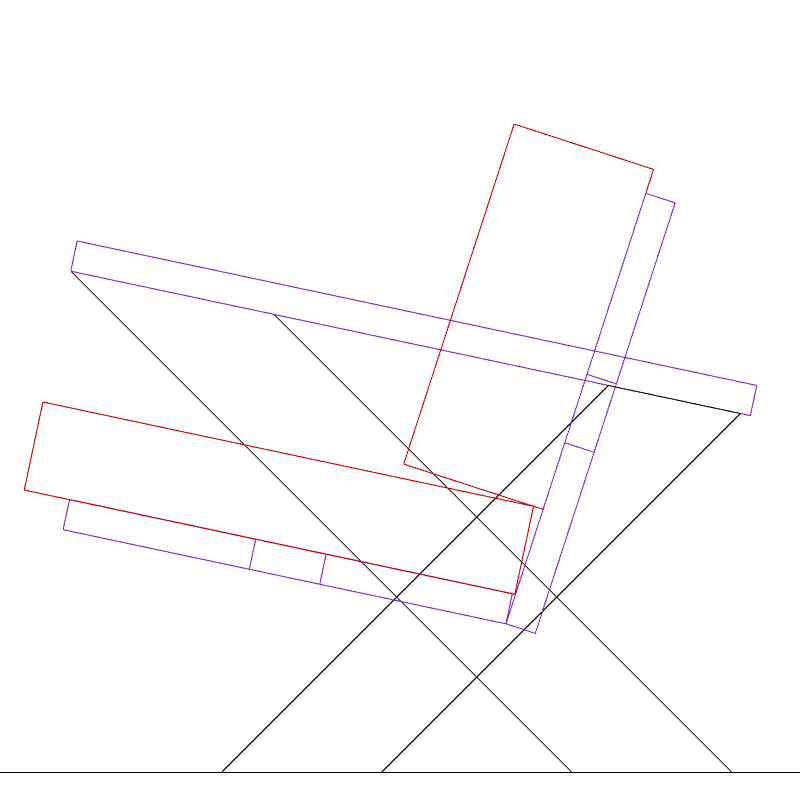

I started trying to match the original design in which one of the X's legs continued to form the angle for the backrest. When this wasn't working out, I considered adding in a backwards tilt to the seat and armrest to make it more comfortable, but this introduced additional angles that pull away from the original idea. The final design was also the most simple/straightforward: straight seat with a backrest that doesn't have to follow the angle of the X.
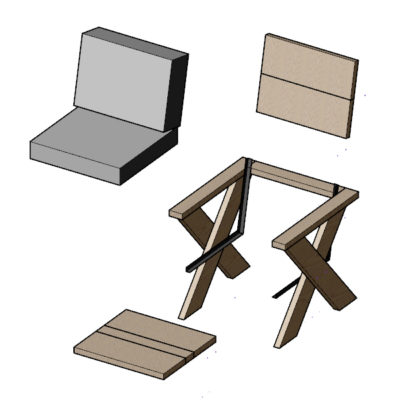
At this point, I had what I needed for the actual build, but I decided to continue building out the model and started playing around with the graphic output I could create. A lot of what I do at work is detailing a design so that other people can understand and build it. Clear graphics and details are essential to this communication, but I also find the output pretty satisfying.
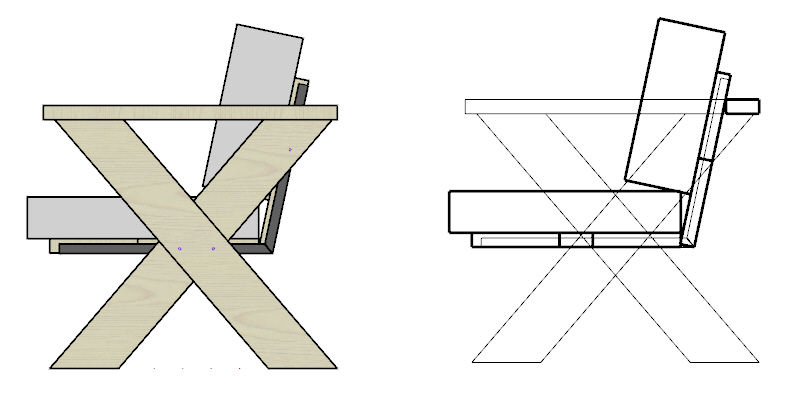
My preferred graphic style is slightly cartoonish, with solid lines and minimal/washed out use of color, so I wanted to snazz up the output from Rhino's default color blocks. Rhino's workflow, especially for graphics, seems pretty layer centric, so after fully modeling all the geometries, I assigned the geometries into layers by material (wood, metal, cushion). I then assigned a render texture that matched each material, and tweaked the display style until it included the line work and washed out the textures a little.
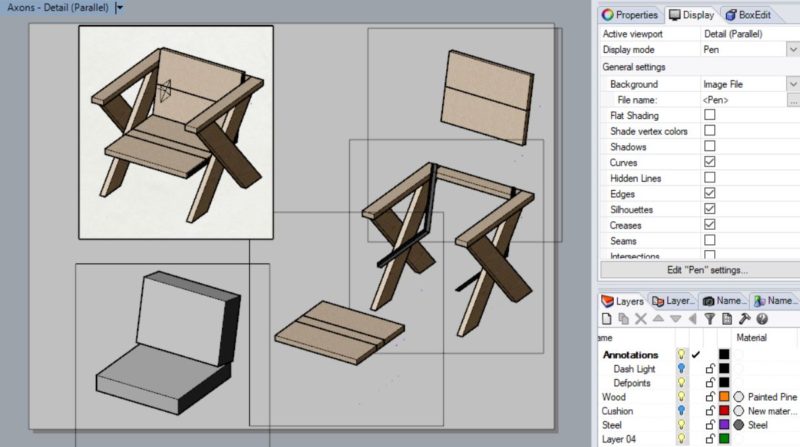
I set up some view ports with an axonometric view and used the same trick outlined here to created an exploded view of the assembly. Since I have things broken into layer's by materials I used HideLayersInDetail to toggle visibilities. For the views with multiple wood components, I used HideInDetail to isolate each piece.
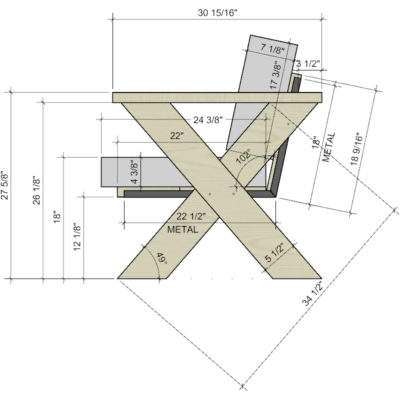 Once the graphics looked ship shape, I turned to actually pulling the dimensions to build it. In a way, there's an art to this as well: which dimensions are pulled, and how they're represented in relation to the drawing has a big impact on the clarity of the design for someone to build from. Minimizing the number of overlapping lines, aligning dimensions that reference the same points (or deliberately offsetting if they don't), and creating a hierarchy across the visual information on the page. These are all useful strategies in annotating the view of the model.
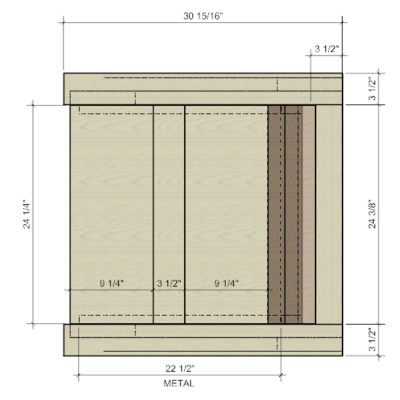 There's also a balance to consider, between providing too much information and providing just enough. I often find it's helpful to think through the most likely sequence for constructing a project and add information as I think through what I will need. How much wood will I need? I should add dimensions to all the longest lengths of each piece. How am I cutting the pieces? Add an angle to the end of any piece that isn't 90 degree (thinking through how that angle will be set on a chop saw.) If someone were trying to recreate the model, what dimensions would they need? Even as I make these considerations,there is often information that is missed. Having the model available to pull additional dimensions is just as helpful, if not more so.