Day 1
Jump to Day 2 or Day 3Actually, the story of the house framing starts a week or two prior, when the delivery from Home Depot was dropped off, and I do mean dropped. I was dismayed to find that the curb-side delivery was less than gentle for the pieces of drywall on the bottom (cursing Home Depot might become a recurring theme of this project.) After a great deal of hefting and some very tired forearms, we had a pile of building supplied in our space. After a week, however, I noticed that the wood was piled in such a way to restrict airflow, and the lumber seemed to be taking on moisture from the concrete floor. To remedy this I reorganized the pile of lumber, boosting the bottom pieces off of the ground and leaving gaps for air to circulate. I think it helped a little.


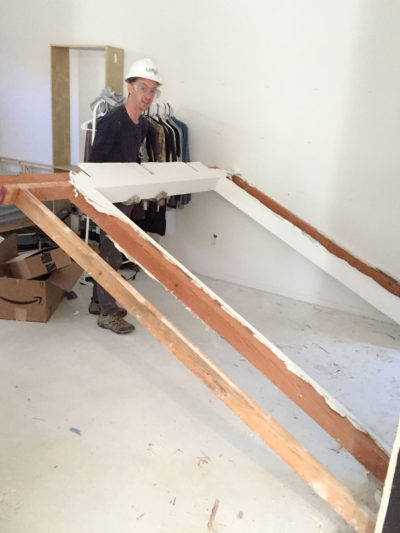
On the first day of a long, 3-day weekend, my roommate and I started with an exploratory hole into the ceiling. We needed to know where we would be able to attach the walls to something more structural, and the stud finder was being unreliable. It was suggesting that the ceiling joists were running counter to the structurally logical direction. After cutting the hole, we stuck in a phone, took a picture, and figured out why: the drywall ceiling is hung from metal drywall hangers, which space the ceiling about a half-inch off of engineered wood I-joist. Our stud finder was picking up the hangers which ran perpendicular to the studs. With that mystery solved, we got to framing.
")

We started on the tricky corner, and had to frame around a conduit line. We could have taken the conduit down, but it actually provides power to an ideal spot. Framing around it, however, involved a great deal of shimming in order to still tie in at the wall. The next tow walls were pretty straight forward. We were using a simple tilt-up system. The bottom plate is pressure treated so it can handle absorbing moisture from the concrete sub-floor, and the top plate is single as opposed to the more conventional double. With the walls being tilt-up and non-structural I didn't see the need to follow the double-top plate convention, and knew I could save on lumber as a result.
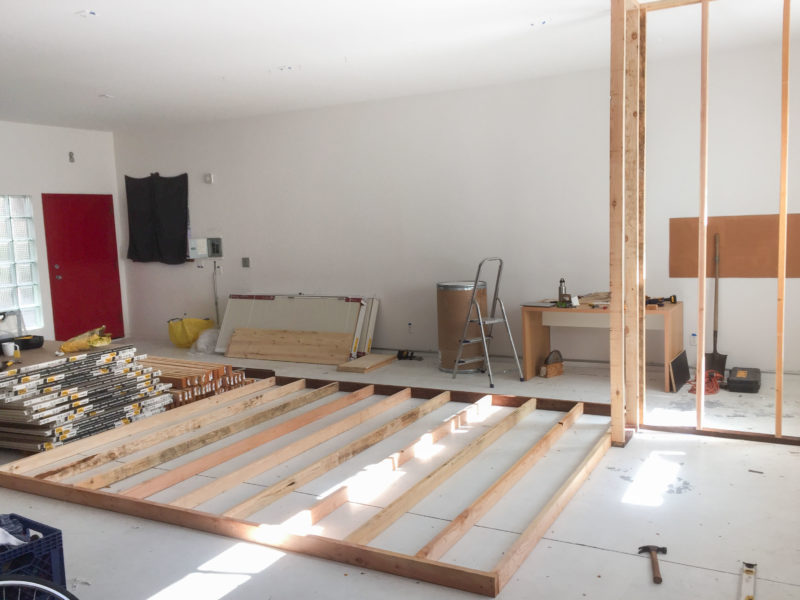
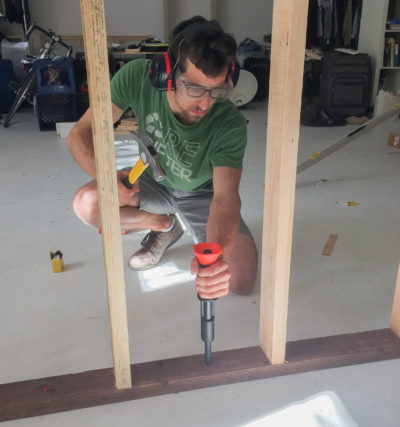 Anchoring in the walls was a fun, terrifying learning experience. I learned how to use a ram set tool to drive masonry screws through the sole plate and sub-floor. It's an unnervingly loud tool that fires a gunpowder cartridge to blast in a nail, all driven by the whack of a hammer. Luckily it was 4th of July weekend, and loud bangs went relatively unquestioned.
Day 2
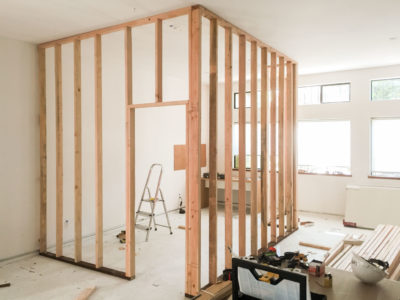
We continued on Day 2 by framing the most complicated wall section: the door. With the tilt-up framing method we chose, we should have run a sole plate across the bottom length of the door, but the wall had gotten to be just slightly wider than the 8' designed. Rather than buying a whole new piece of lumber we took on the challenge of framing the rough opening for the door without the bottom. The trick with doing this is keeping the opening square and frame square, so we made frequent checks of the diagonals to insure everything was right.
I've learned a fair amount of construction terms with this project. The rough-opening of the door is framed on either side with "Jack" studs, which are tied into "King." The short "cripple" stud above the door rests on the door "header" (OK I knew that one,) which bears down on the Jacks. The more you know!
With room #1 now completely framed, we started work on room 2, which extends (and improves) an existing walled-in area. The first step, which I was most excited about, was demolishing the end wall. After clearing away an area around the wall, I took the first swing. Then my roommate took a turn. Then a number of our friends who happened to drop in on us took a whack. Everyone agreed it was a great way to let out some stress.
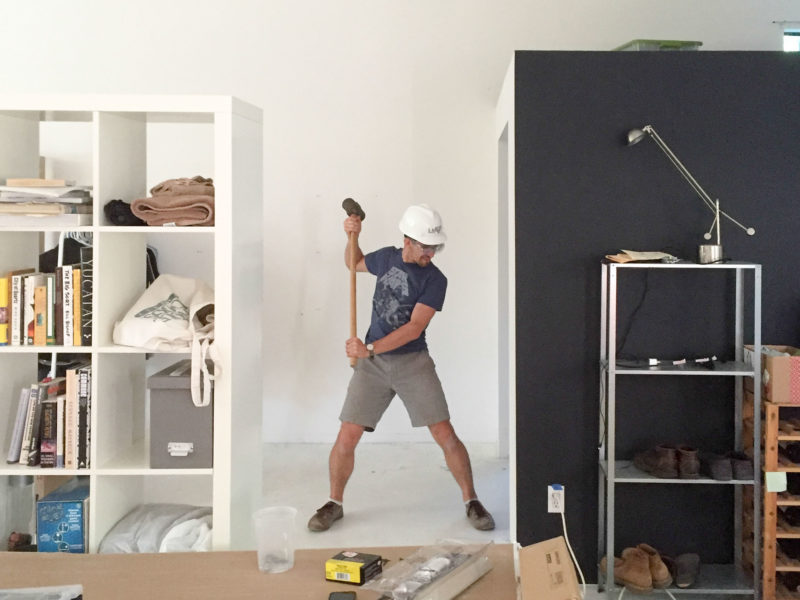
After the wall was thoroughly opened up, we started on the more delicate work of detaching it from the adjacent wall. The drywall is tied together at the outside corner with an metal strip called a "corner bead," which we needed to remove carefully to preserve the drywall on the black painted wall. When we had to call it a day, I was shocked to see how much debris drywall can create. It's made me nervous about when we clad these walls.


Day 3
We began our third and final day of framing by finishing off the demolition from the prior day. The first thing to go was the plywood ceiling over the space. Again, we were fortunate in there being a break in the joist pattern which gave us a really simple way to contain the extent of the demolition. A small metal crowbar-like object called a "cat's paw" proved invaluable when it came to first pulling the nails that attached the plywood to the joists, then again when pulling out nails hanging the joists themselves.


The connection to the existing wall we wanted to save was a little trickier. Since it was attached to the demo wall with nails we couldn't get at, I broke out a reciprocating saw. With this powerful little tool, I cut down along the seam between studs and right through the nails tying the two together.
 With the wall now loose at all points except the floor we pulled it over whole rather than continue the tedious disassembly. After putting the wall aside, we cut the still anchored sole plate loose from the masonry nails. I tried to remove the nails themselves with the reciprocating saw, but was shocked at their resilience. Then, thinking they should pull the same as a wood screw, I proceeded to break off the head of a framing hammer trying pry them out. Some research suggested we would need to grind them down with a dremel.
After a quick trip to Home Depot for a new hammer, we resumed construction. First up were these two mini "cripple" walls, that sit on top of the existing construction, extending it up to the ceiling, where we tied it into the ceiling joists. (Don't worry we flushed up that top corner.)


The next wall was the tricky one with the door. This time, though, we had enough pressure treated stock to run the whole length of the opening. I would later cut that piece away with the reciprocating saw.

It was fortunate with this project that most of our longest walls ran perpendicular to the ceiling joists, allowing them to be secured at the top. The final wall, however ran parallel to the joist grid and didn't happen to line up with one in the ceiling. We needed something to anchor this wall to and it was close to one in the existing wall, just not close enough...dang! To make it work, we shifted the alignment of this wall to be on the outside of the wall with the door. Since we had to build a wall slightly larger than the designed 8, we had to cut a 10' stud for the top plate, and splice together a sole plate. With a little shimming at the walls and ceilings, we were finally done with the framing. Not to shabby for a quick 3-day build!
:-)