I’m really loaded up on projects right now, but that’s just the way I like it. This particular one is something that my roommates and I have wanted for a while.
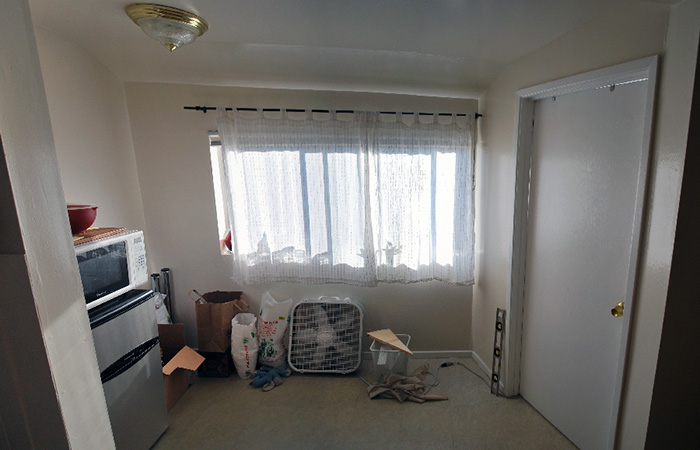
In our home we have a super awkward side nook attached to our kitchen. Currently we keep our recycling there along with a small refrigerator for beverages. The angled wall presents a slight challenge, but what we’ve always wanted is to have a bar table there for breakfast or to keep fruit bowls on.
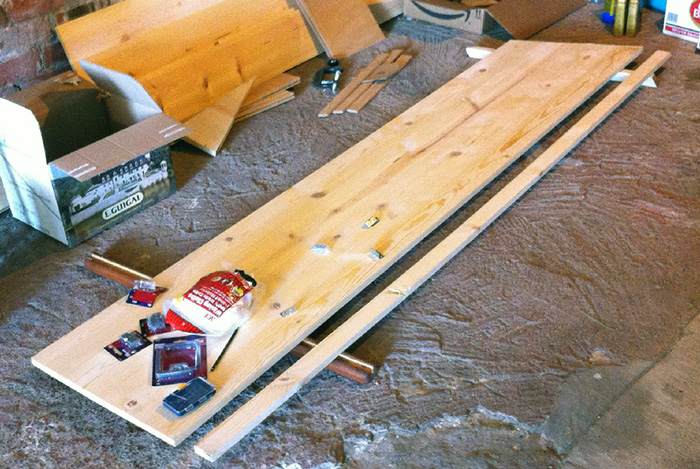
The counter top is going to be built entirely from one sheet of pine. Our experience with Lowes’ order ahead was terrible. They basically had no record of our order. It would have been faster for me to just go and grab the wood (and I probably could have picked out a better quality one too.)
I started with a 20” x 8’ board, so I needed to rip it down to 18” wide. The 2” strip of extra material became a lip to thicken up the front edge of the table a typical counter top detail.) I also had to cut an angle off of one of the ends to fit into that awkward little space. Unfortunately I didn’t start documenting the process until this stage:
The next step, attaching the apron, is really the trickiest part so far. Rather than exposing screws at the front face, I’m putting L-brackets at the back. The challenge is attaching them at just the right height so that the top edge of the apron and counter will be flush.


I manage to do this by holding the front strip of wood and bracket in the right spot with one hand, and marking the drill spot with the other hand. With the holding hand I was also feeling underneath to make sure that the top surfaces would be as flush as possible. Because the wood is warping so much, I place the brackets every 8” in order to force wood into place. After which, I’m starving and take a break. When my roommate saw my progress he told me that it looked pretty good, but… the lip was on upside down.
*FACESMACK!*
Luckily that’s not too difficult to recover from. The brackets were set at the right height for the lip. All I need to do is flip the whole thing over and attach the lip to the other side, but now there are a bunch of holes on the top side where I’d originally screwed in the lip, dang it! Wood filler to the rescue! I fill those up and clean the whole thing off with some sanding.


Ok, the lip is attached, the holes are filled, and the board is sanded. Time for some finishes. Now there are a few staining options I’m testing out, but I think I'm going to end up leaving the woods natural color and sealed with whichever polyurethane doesn’t yellow too much. My wood design instructor would be proud, I made sure to have a test piece for finishing options. Looks like none of the stains are reacting very well with the wood. Wipe on poly it is then!
I’ve given myself the deadline of this Friday to finish the table. The steps that still remain: finishing the counter with 3-4 coats, cut out and drill some shims for the legs (our floor is horribly uneven), and assemble the whole thing. It’s going to be a busy week.
Continued in Part 2