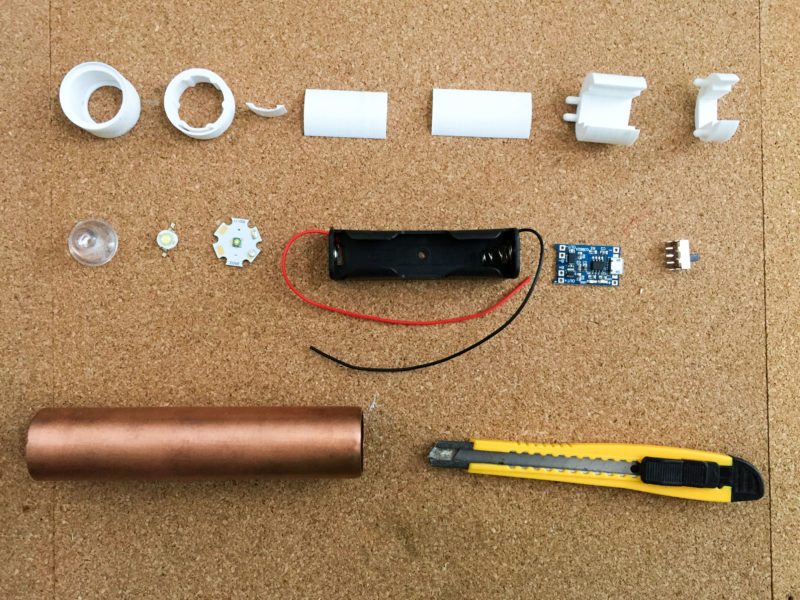
I have the first prototype of my flashlight nearly complete. I designed the housing components to be 3D printed, then sent them over to a friend with a printer. While assembling, I learned what needed tweaking in my model in the overall design.
One thing I learned very quickly was that I'd made the model too tight on the inside of the shell. This was almost canceled out, as I learned, by the 3D print shrinking slightly. It was always apparent which side of a piece was facing the bed of the printer because it would flare out to the modeled size while the rest of the piece shrank inward by .2 mm (almost enough to fit in the shell.) I still had to sand it down till it fit.
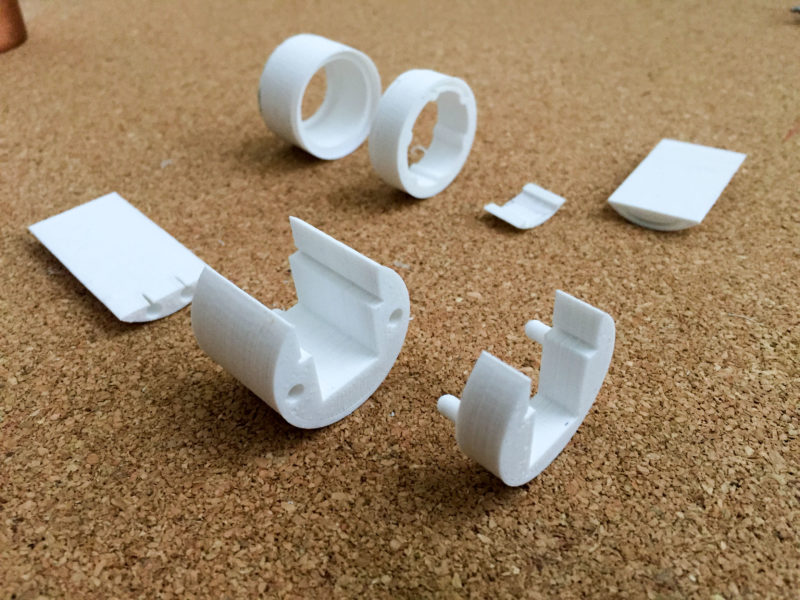
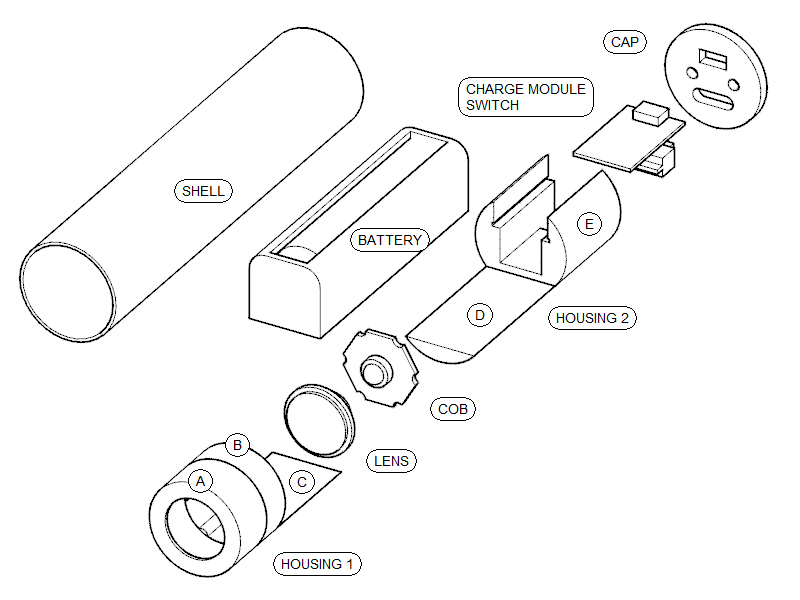
Once inside the 1" copper tube, there is very little space around the battery, so the housing has a simple shelf across the bottom of the pack. My assumption with 3D printing was that sharp overhangs are best avoided, so the housing is split into 2 halves, front and back, which are divided along this battery shelf. I plan to glue these to the battery pack to create a rigid assembly. One advantage this gives me is freedom to shorten or lengthen the housing to adjust for any slop in the shell length. One challenge of this approach is that it complicates the final assembly and wiring sequence.
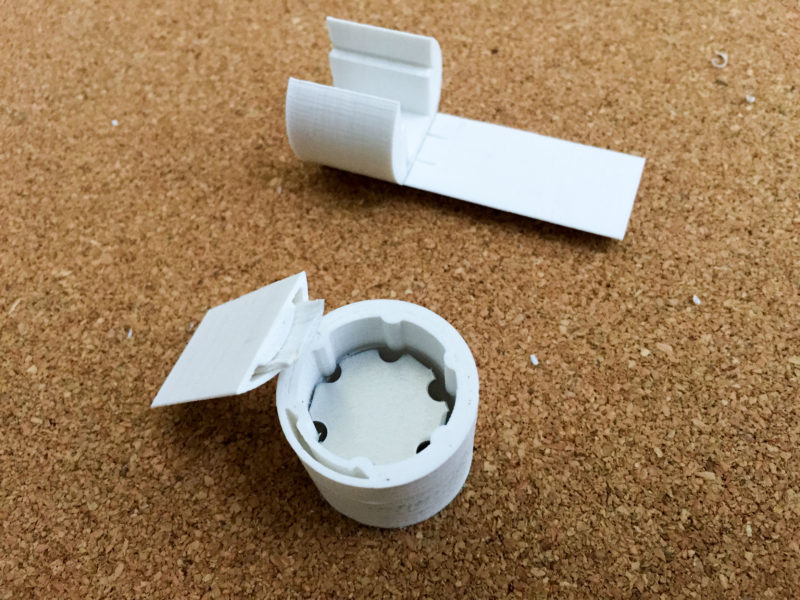
My friend with the 3D printer decided it made sense to further break up the housing from the original 2 halves. Some of the joints he incorporated worked well, but the smiley face-shaped one connecting the front half of the housing and the battery shelf was too small for the tolerances of the printer. The peg style joint on back half seemed to work well enough.
The lens has a small ridge which allows it to press forward through the housing and sit flush with the front of face of the light. It has to drop through a hexagonal channel meant to hold the heat sink/LED in place. While the lens fit with the housing quite well, the heat-sink channel was way too loose. I'd planned to incorporate a strip of foam to act as cushion for the battery, and press the LED into the lens, holding them both in place but, I might change this out for a few screws to hold the heat sink in place.
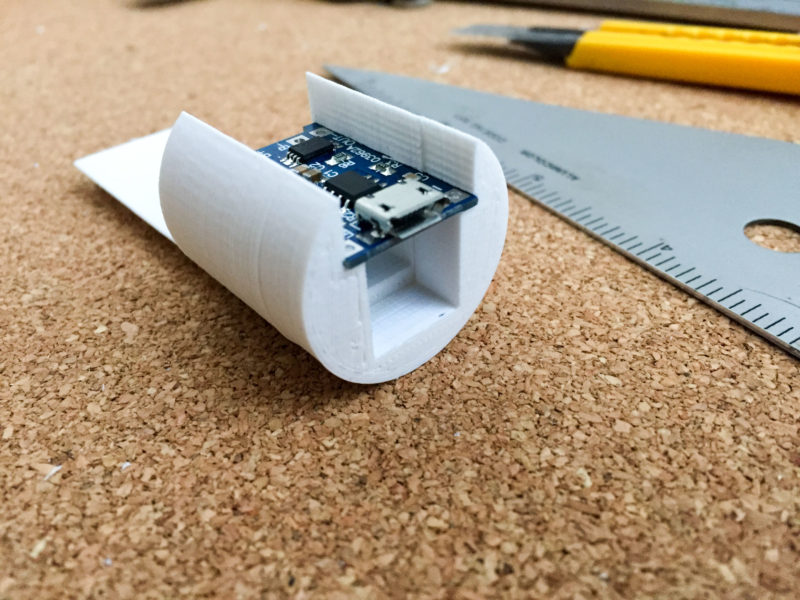
The shrinking and tolerance of the print gave me similar trouble with the back assembly. The groove for the charging module was too small, so I had to cut and file that until it worked. The shrinking of the print also caused the C-shape of this piece to clamp down on itself making the pocket for the switch too snug. Once I put in the charge module this opened up enough though.