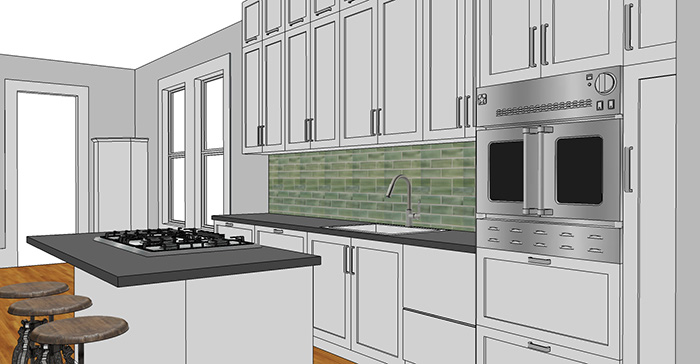
Redoing your kitchen can be incredibly daunting. Making a model in SketchUp is one way to test your ideas, see what you like, and make decisions without committing a huge investment of resources.


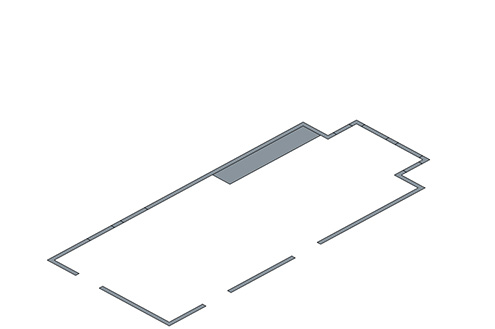
To start, you're going to need to take measurements of the layout of your kitchen. Sketch a quick floor plan, then take measurements. Recreating that floor plan in SketchUp is a simple matter of using the Line tool (L) and entering distances.
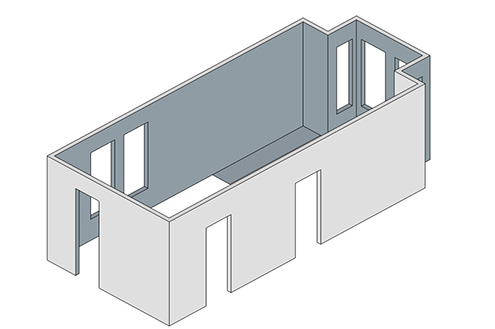
Building Shell:
To start adding dimension, first you'll need to get out of plan view. Use the orbit tool ("O") and look at your model from the side. I also like to change out of "Perspective" and into "Parallel" found under the "Camera" menu.
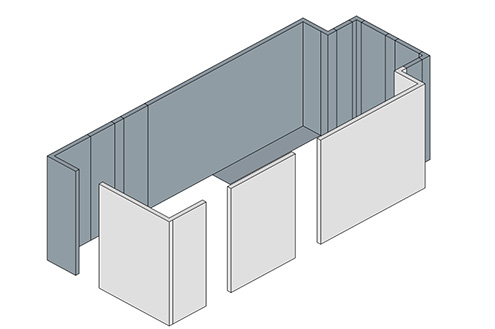
Using Push/Pull ("P") extrude the walls up the height of the room. While extruding, you can enter specific heights such as 10' 6" or 126 inches.

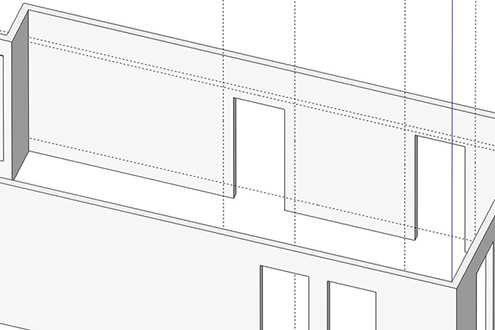
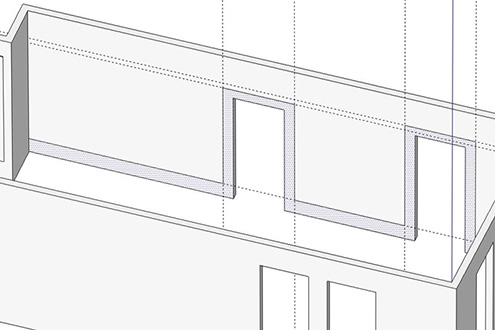
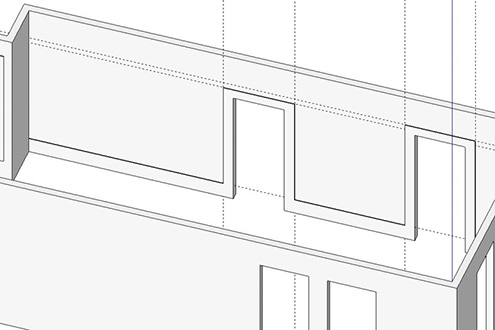
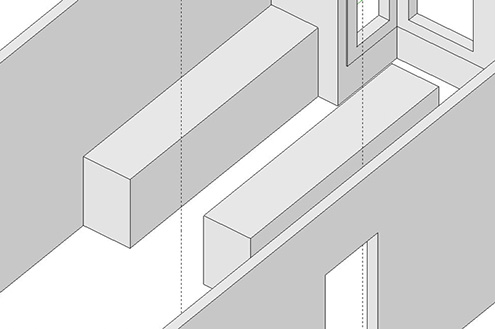
The openings for the doors will extrude vertically as will the lines for the windows. Measure up to the sill height and the header heights of the windows, draw across to connect them, and erase the lines above and below.
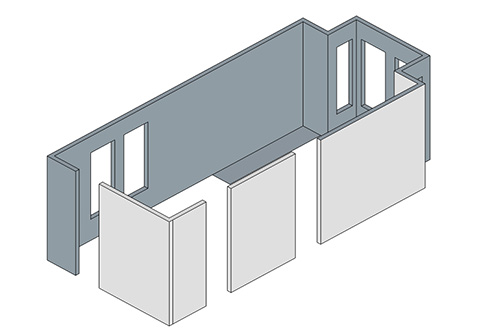
To punch the openings for the windows use the Push/Pull tool (P) to push the rectangles back into the walls. If you snap to the outside face of the wall the Push/Pull tool will understand that you want to create a void.
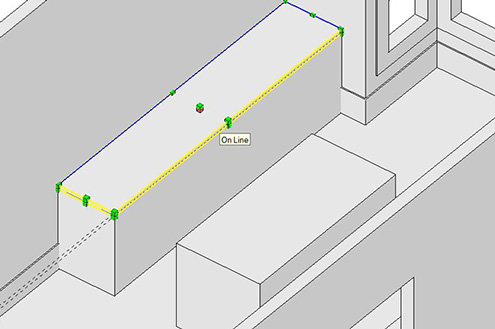
To make the door headers draw a line up the opening that is the height to the header. Then draw a line across the thickness of the wall. Again using the Push/Pull command pull the face above the line across the door opening till it meets the other side of the door.
You may notice some of the faces appear blue, while some are white. This means they are "facing" different directions. To make all the planes face the same way, right click on on one of the white faces and select "orient faces."
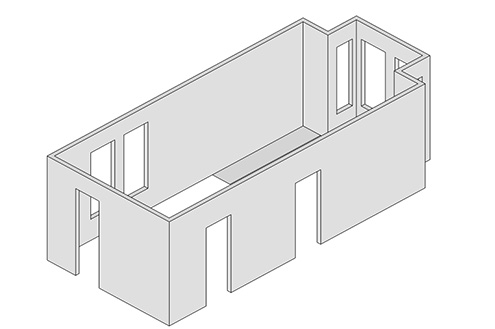
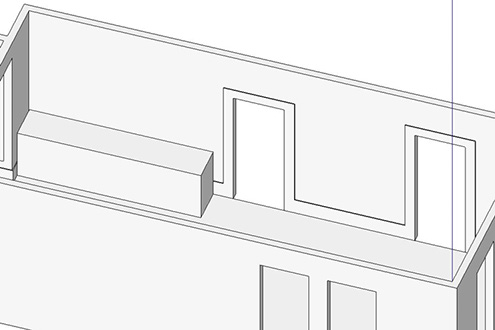
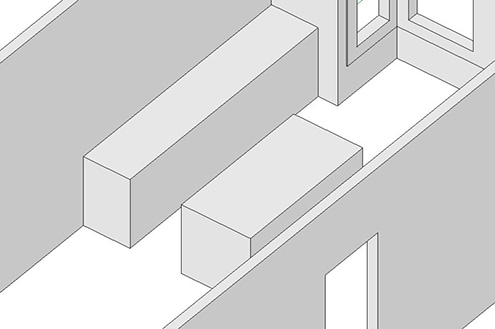
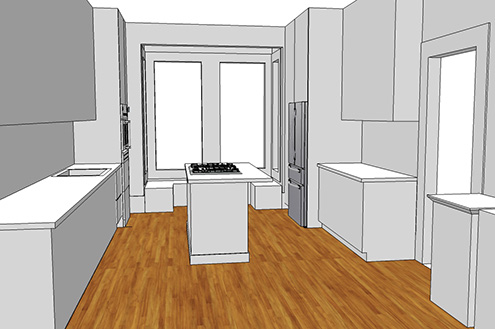
Awesome! You now have the shell of the building complete.
Awesome! You now have the shell of the building complete.
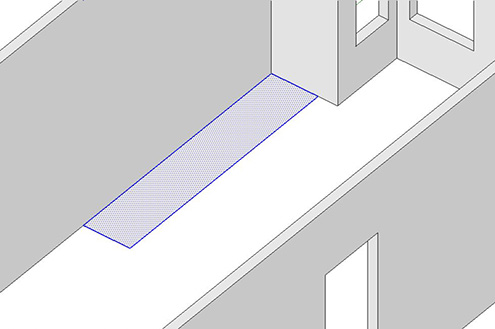
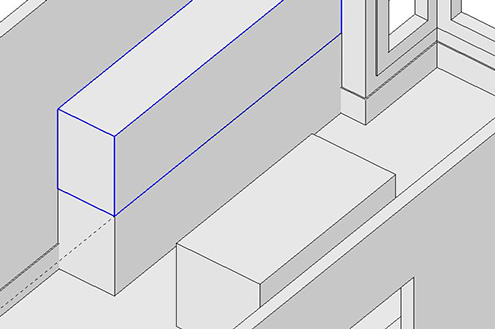
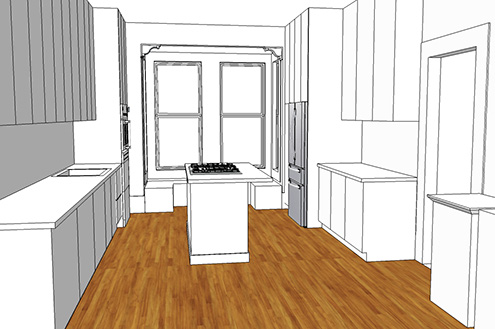
With the walls modeled, the trim is an easy next step. First use the tape measure (T) to measure out references lines from each opening and from the floor.
With the reference lines drawn it's a snap to draw the actual Line (L) of the trim. Just allow the tool to snap to where each reference line intersects.
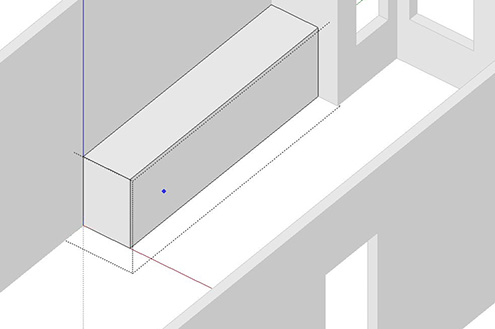
Use the Push/Pull tool (P) to extrude the trim out an 0.5 - 0.75 inches.
Once the trim is in place it's easy to clean away the reference lines. Go to edit>delete guides. Now about that counter...
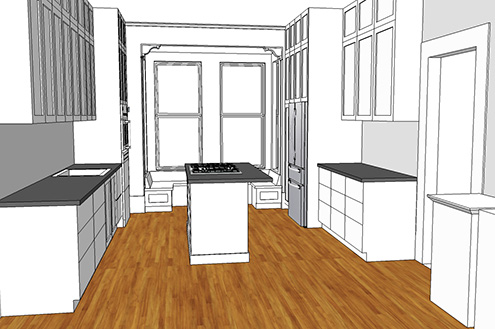
Counter Tops and Cabinets
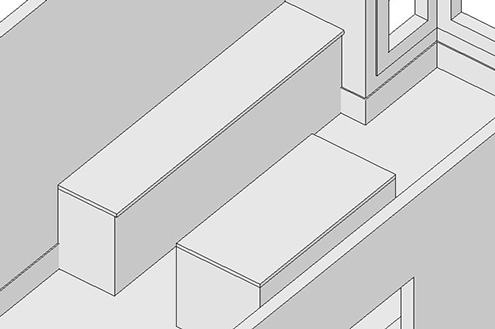
Start your counters with a Rectangle (R) in the shape of the base. Typical counter depth is 24" and it's a good idea to keep to increments of 3" in length. Because anything drawn in SketchUp has a tendency to stick together I try creating a group of objects like the counter top (Ctrl + G) is a great way to keep it contained.
Double click a group to open it, and within the group Push/Pull the rectangle to give it some volume. Most kitchen counter tops are about 36" high. We'll add in a 1.5" counter top in later, so the cabinet can be extruded to 34.5".
To make a second counter, it's easiest to copy the first one. Copy (Ctrl + C) paste (Ctrl + V) is one way to do this. Another way is to hold down the Ctrl key while using the Move tool (M).
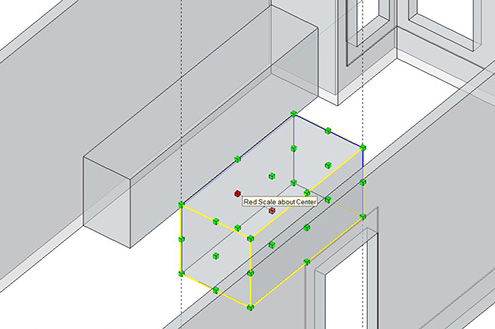
To shape the counter top copy into an island, first measure out the dimensions from on corner using the Tape measure (T). Then use the scale tool to morph the box to fit with those dimensions. One word of warning, scaling groups like this can affect how textures are mapped. down the road. An alternative is to open the group and adjust the dimensions using Push/Pull (P).
We now have a cabinet base and a counter base! Up next, we'll add a counter top!
To make the counter top is a simple mater of copying a block up to sit on top of the cabinet.
Then use Tape Measure (T) to measure out 1.5" thickness and scale down the top. You can also extend the edge 1" over the edge of your cabinet.
Then add a counter top to the island as well.
Rendering and Details
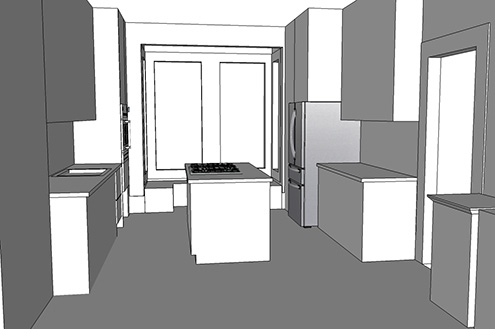
After adding all the counter tops, it's time to start detailing and rendering a view. Switch back over to "Perspective" view under the "Camera" menu. Orient the camera to a good interior view by zooming (Z), orbiting (O), and panning (H) into position. Zooming can also be accomplished with a scroll of the mouse wheel and panning can be accessed by holding shift while using the Orbit tool.
Once you have it, save the view by opening up the "Scenes" panel, found under the window menu. Save the view as a scene by clicking the + logo. Now you can orbit around, and make various changes in the model: adding toe kicks, additional trim, or changing the cabinet layout. You can always return to the same view by clicking the "Scene" tab at the top of the window.
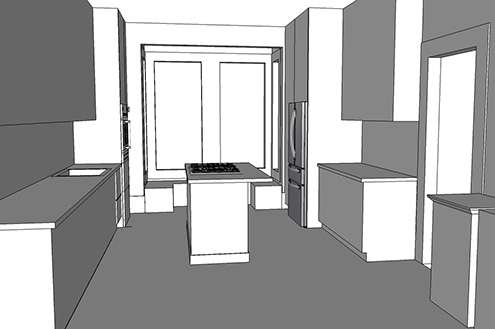
Adjust the lighting by opening up the "Shadow Settings" panel under the "Window" menu. First click to "Use sun for shading." Then adjust the lighting to your preference. Adding in a floor texture gives a great reference plane for adjusting the brightness and shadows.

Drawing in the lines of the cabinet is a big step. The standard for cabinets is multiples of 3" so depending on the layout of your kitchen you can get any variety of sizes. It can be quite the challenge to match the upper cabinets, lower cabinets, and appliance spacing.
Little detail can make a big difference. Adding in the window frames and spandrels at the top of the bay window area start to make the kitchen feel less abstract, more real.
The project also needed mostly drawers for the lower cabinets. Adding an inset for the uppers is quickly accomplished by offsetting (F) the faces of the cabinets or drawers inwards about 2". Then use the Push/Pull to push the center face in about 1/2."
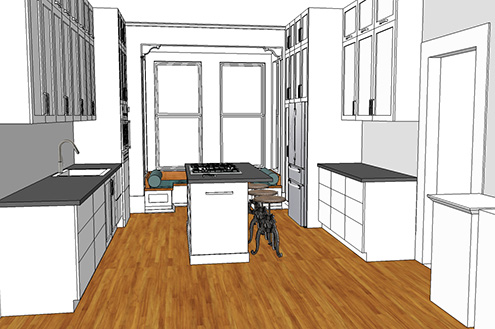
Furniture, appliances, and other additions can be found in the 3D warehouse online. By opening the "Components" panel under the "Window" menu, then searching what you need, you can find a download a huge variety of pre-made 3D models.
A tile back splash can be added to bring in that last bit of accent color, and handles at each of the drawers adds that extra bit of detail to bring your kitchen to life!
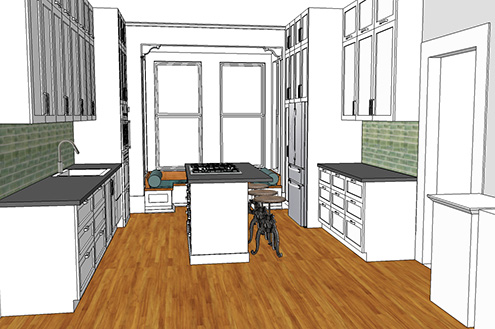
The finished model can be used for any number of views and can help you visualize your kitchen design! Different size appliances, finish materials, and cabinet styles can all be substituted in to customize your kitchen the way you like!